Zerobyte
Zerobyte is a popular self-hosted backup automation solution based on restic. It allows users to easily manage and automate their backup tasks through a user-friendly web interface. By integrating Tinyauth as an OpenID Connect provider, you can enhance the security of your Zerobyte instance by enabling single sign-on (SSO) and centralized authentication.
Requirements
Section titled “Requirements”- A running instance of Zerobyte
- A Tinyauth instance
- A cup of coffee (optional but recommended)
Tinyauth Configuration
Section titled “Tinyauth Configuration”To begin with, we need to generate a client ID and secret in Tinyauth for Zerobyte. This can be done by running the following command:
docker run -i -t --rm ghcr.io/steveiliop56/tinyauth:v5 oidc create zerobyte./tinyauth oidc create zerobyteFrom the output, make sure to note down the client ID and secret as we will need them later for the Zerobyte configuration.
Now, we can pass our configuration to Tinyauth using environment variables:
TINYAUTH_OIDC_PRIVATEKEYPATH=/path/to/private/key.pemTINYAUTH_OIDC_PUBLICKEYPATH=/path/to/public/key.pemTINYAUTH_OIDC_CLIENTS_ZEROBYTE_CLIENTID=client-idTINYAUTH_OIDC_CLIENTS_ZEROBYTE_CLIENTSECRET=ta-client-secretTINYAUTH_OIDC_CLIENTS_ZEROBYTE_TRUSTEDREDIRECTURIS=https://your-zerobyte-instance.com/api/auth/sso/callback/tinyauthTINYAUTH_OIDC_CLIENTS_ZEROBYTE_NAME=ZerobyteRestart your Tinyauth instance to apply the new configuration.
Zerobyte Configuration
Section titled “Zerobyte Configuration”Next, we need to configure Zerobyte to use Tinyauth as an OpenID Connect provider. This can be done by creating a new client in the Zerobyte admin panel. This can be done by navigating to the Settings page and then to the Organization tab. Here, you can click on the Register New under the Single Sign-On section to create a new client.
Fill in the form with the following details:
| Name | Value |
|---|---|
| Provider ID | tinyauth |
| Organization Domain | The parent domain of your Tinyauth instance, e.g., example.com |
| Issuer URL | Your Tinyauth instance URL, e.g., https://tinyauth.example.com |
| Discovery Endpoint | Your Tinyauth instance URL followed by /.well-known/openid-configuration, e.g., https://tinyauth.example.com/.well-known/openid-configuration |
| Client ID | The client ID generated in the previous step. |
| Client Secret | The client secret generated in the previous step. |
| Link matching emails to existing accounts | Optional, but you probably want to enable this if your users have the same email addresses in both Tinyauth and Zerobyte. |
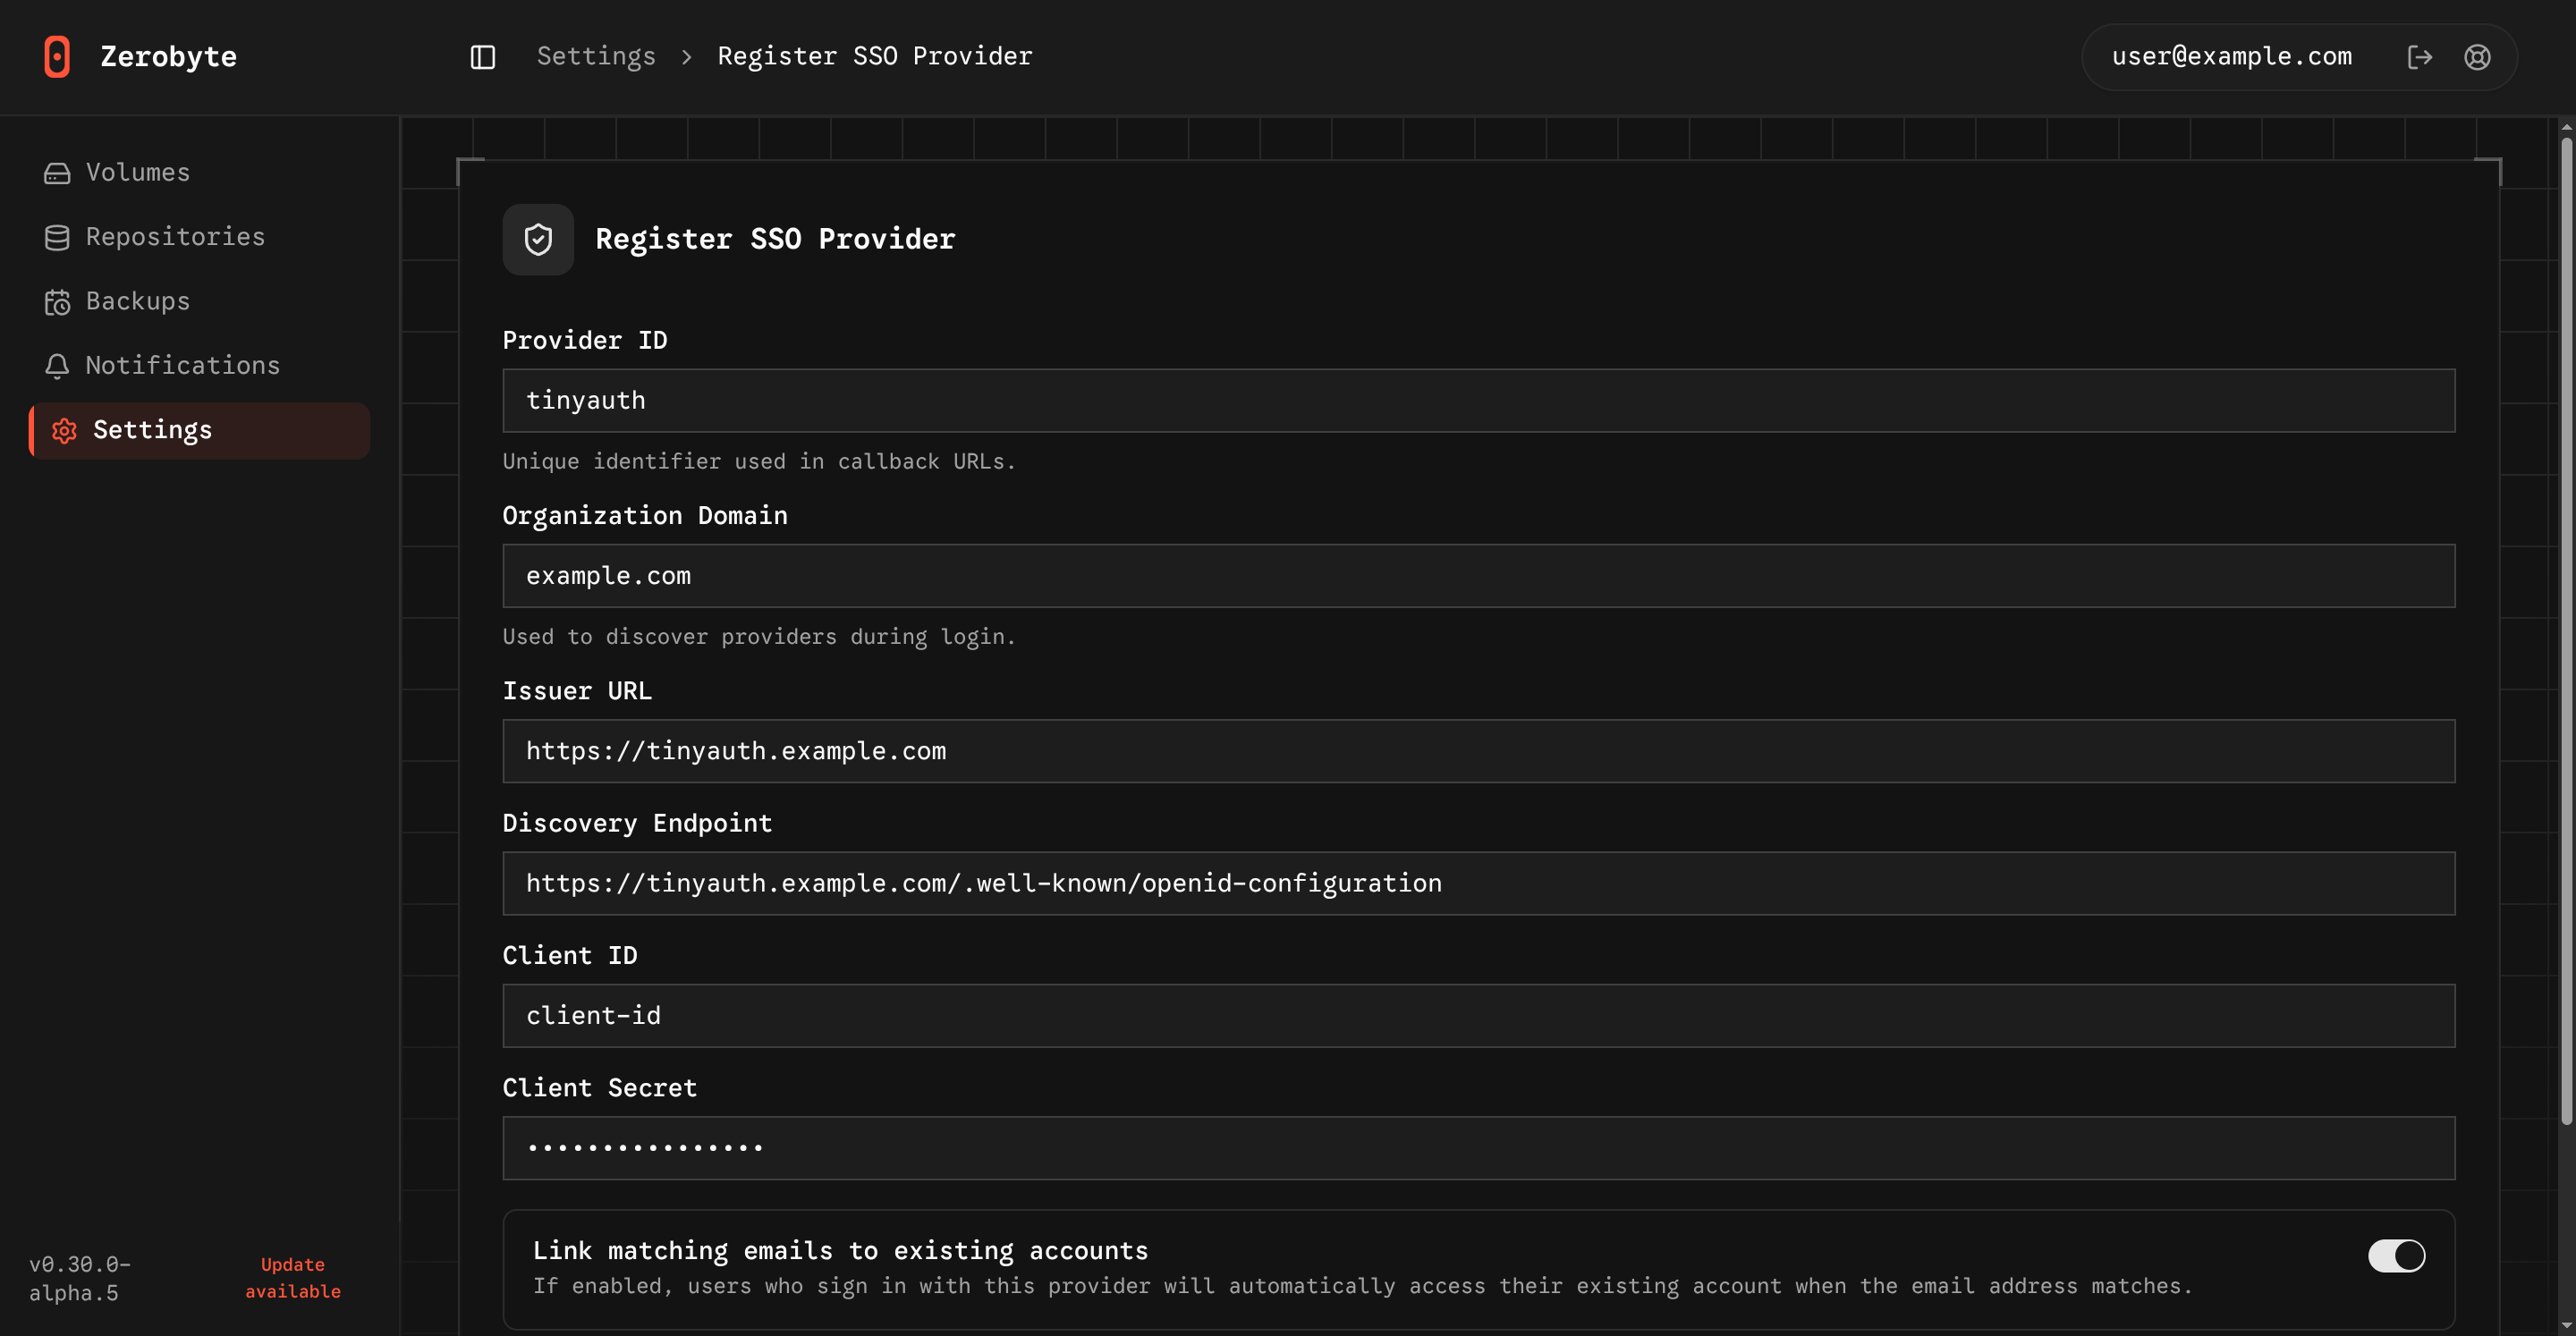
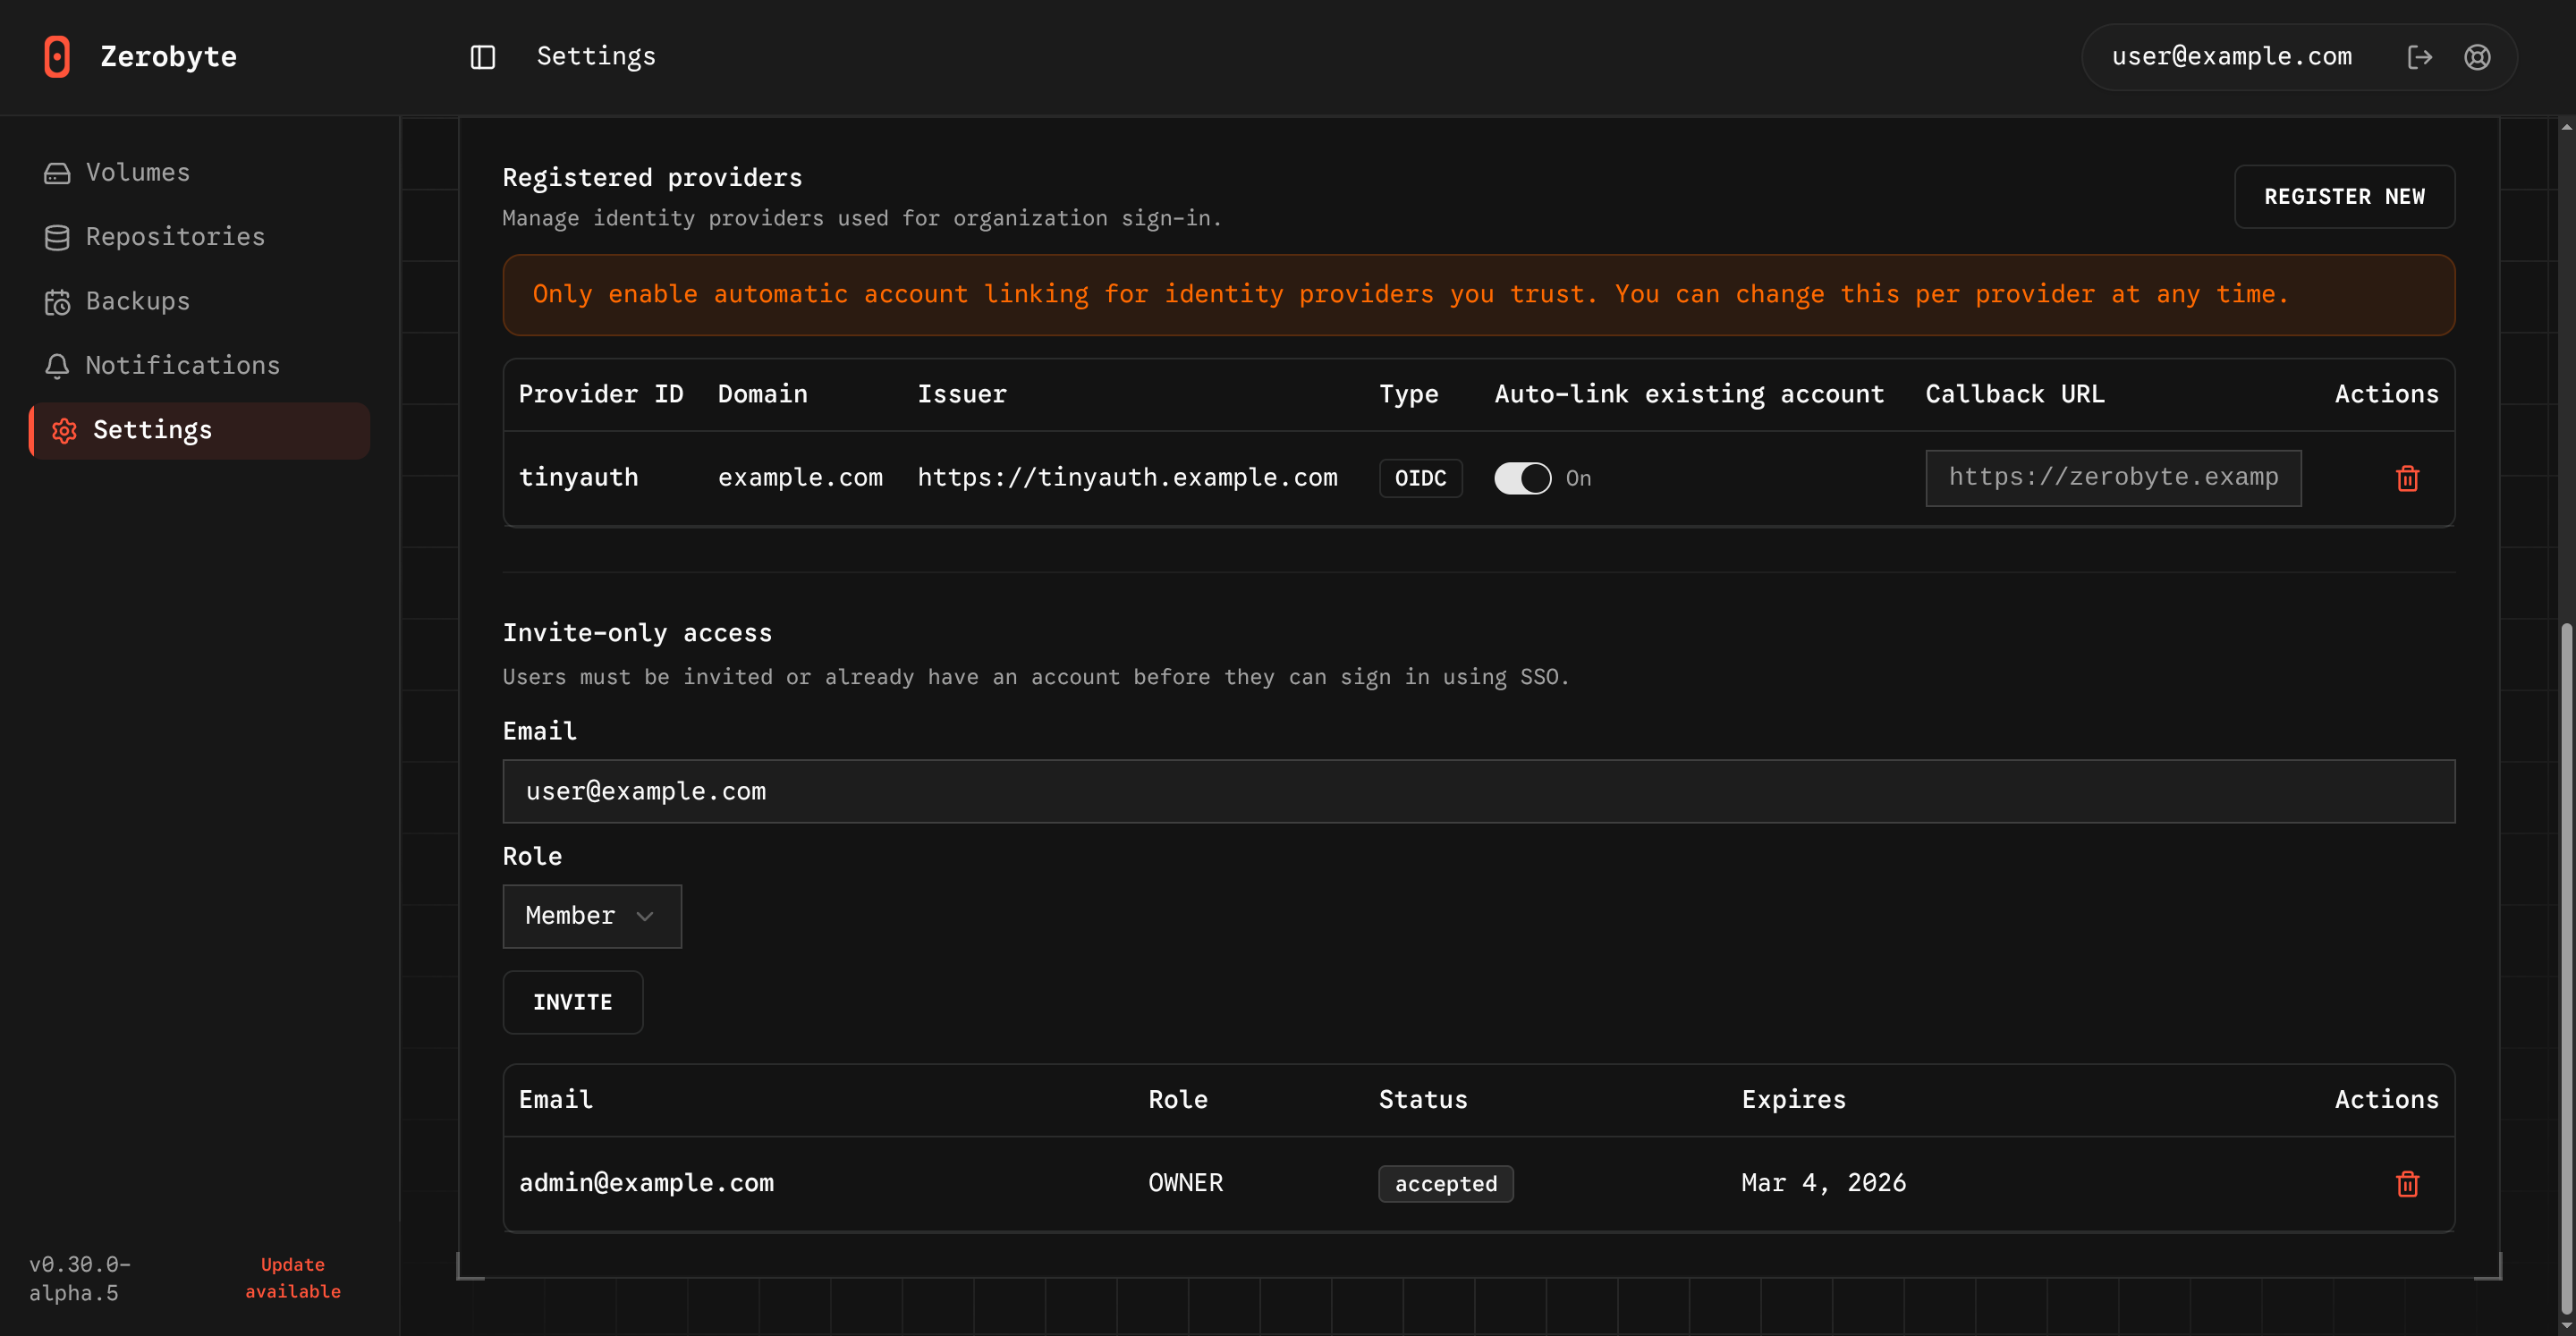
After filling in the form, click on the Register Provider button to create the new client. Lastly, in case your Tinyauth email address doesn’t match with any of the existing Zerobyte users, you will need to invite them to your instance.
This can be done by navigating to the Invite-only access section, entering the email address of the user you want to invite, selecting the appropriate role, and then clicking on the Invite button.
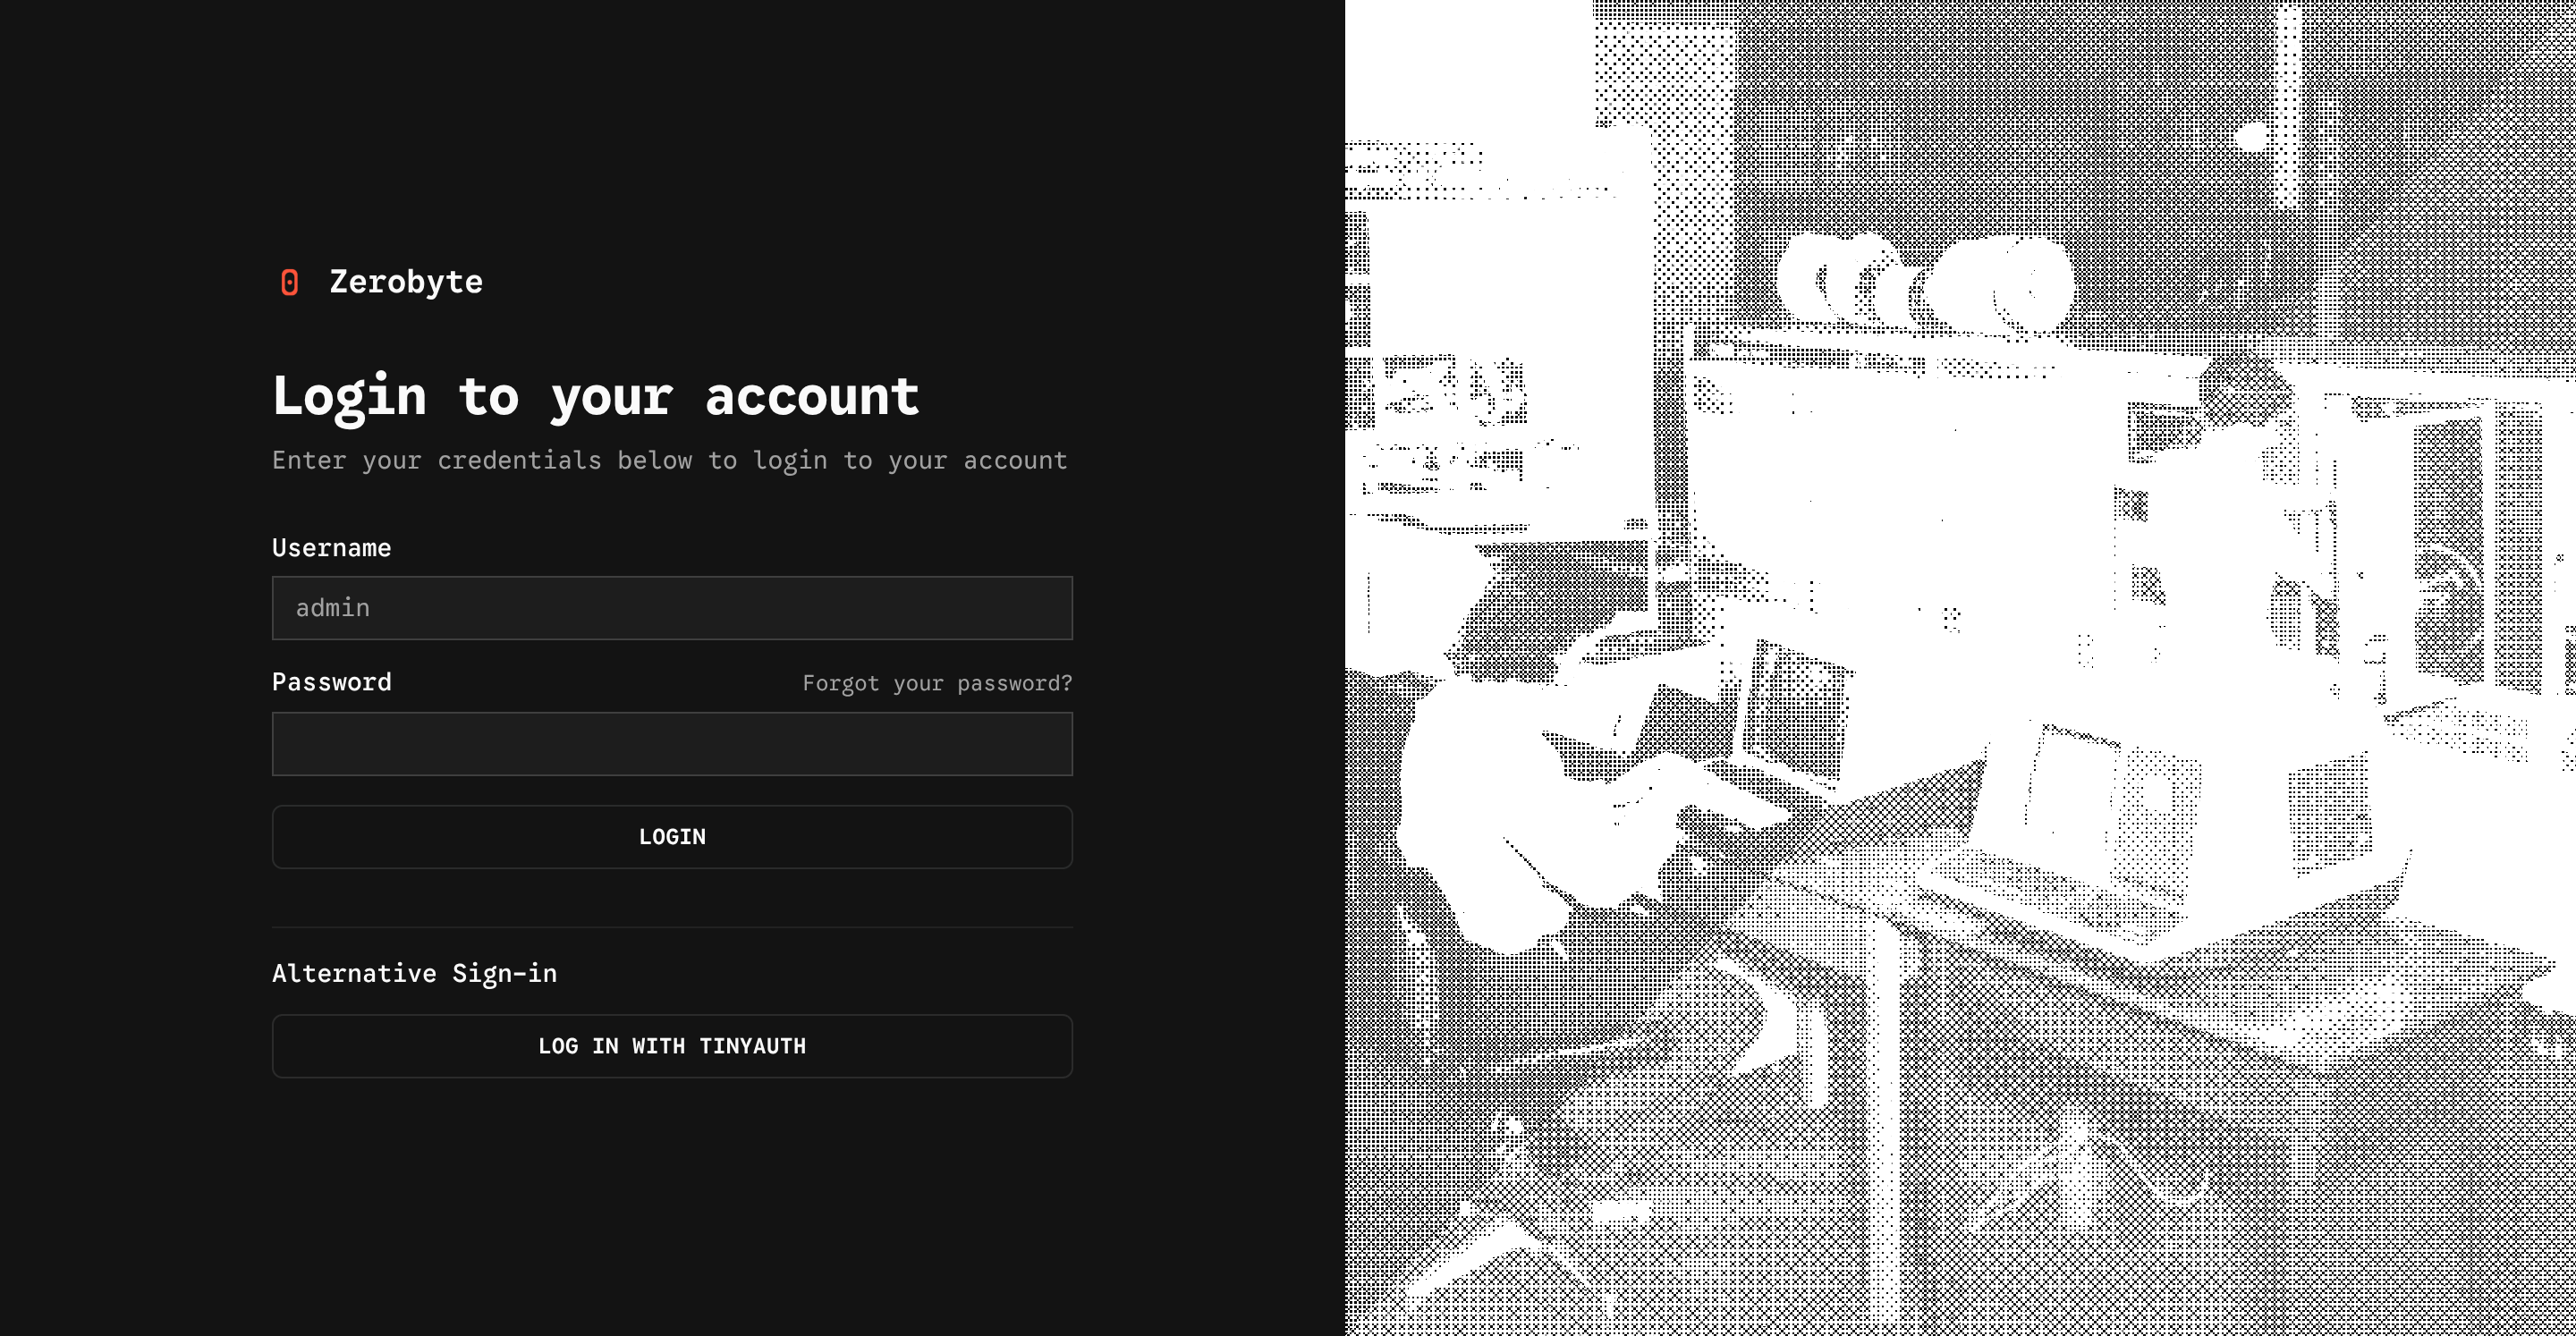
Finally, you can test the integration by logging out of your Zerobyte instance and then clicking on the Login with Tinyauth button on the login page. You should be redirected to the Tinyauth login page, where you can enter your credentials to authenticate. After successful authentication, you should be redirected back to Zerobyte and logged in to your account.