
OIDC Server
In Tinyauth v5, a major milestone was the introduction of the OIDC server, which allows Tinyauth not only to use other identity providers but also to act as an identity provider itself. This means that Tinyauth can serve as a central authentication gateway for multiple applications, providing a single sign-on experience for users.
What is OpenID Connect?
Section titled “What is OpenID Connect?”From https://openid.net:
OpenID is an easy and safe way for people to reuse an existing account and user profile from an identity provider, for example Apple, Google, or Microsoft to sign-in to any OpenID-enabled applications and websites without creating a new registration and password. You choose the provider, such as Google and enter your Gmail address and password to sign-in.
Limitations
Section titled “Limitations”Tinyauth implements the Core and Discovery parts of the OpenID Connect protocol.

Before using Tinyauth as an OIDC server, please ensure that the implementation meets your requirements.
Supported response types:
code
Supported authorization grant types:
authorization_coderefresh_token
Supported scopes:
openidprofileemailgroups
Supported claims:
subnameemailpreferred_usernamegroupsupdated_at
Supported token endpoint authentication methods:
client_secret_basicclient_secret_post
Due to the mostly stateless nature of Tinyauth, the user sub is based on the client ID and the username. This means that if the username or client ID changes, the sub will also change. This can cause issues with some OIDC clients that rely on the sub claim to identify the user consistently.
Important Considerations
Section titled “Important Considerations”Tinyauth’s core idea is to be a stateless application, but OIDC requires persistence for session and key storage. Everything is stored in the /data directory so, if you are using Docker, add the corresponding volume to your docker-compose.yml file:
services: tinyauth: volumes: - ./data:/dataIf you are using the binary, you can specify the database directory using the TINYAUTH_DATABASE_PATH environment variable or the --database.path CLI flag.
You also need to specify the paths where the public and private keys are stored. This can be done with TINYAUTH_OIDC_PRIVATEKEYPATH (--oidc.privatekeypath) and TINYAUTH_OIDC_PUBLICKEYPATH (--oidc.publickeypath) respectively.
Lastly, for the OIDC server to work, HTTPS is required on the app URL, which will become the issuer URL. You can use a self‑signed certificate or a certificate from a trusted CA.
Creating OIDC Clients
Section titled “Creating OIDC Clients”To create an OIDC client, use the oidc create command. For example:
docker run -i -t --rm ghcr.io/steveiliop56/tinyauth:v5 oidc create myapp./tinyauth oidc create myappThis will produce output similar to:
Client Name: myappClient ID: client-idClient Secret: ta-client-secretWe will use these values for the rest of this guide so, make sure to keep them secure.
You can repeat this process for as many clients as you need.
Tinyauth Configuration
Section titled “Tinyauth Configuration”Each OIDC client must be configured with the following environment variables (using the values from the previous step):
TINYAUTH_OIDC_CLIENTS_MYAPP_CLIENTID=client-idTINYAUTH_OIDC_CLIENTS_MYAPP_CLIENTSECRET=ta-client-secretTINYAUTH_OIDC_CLIENTS_MYAPP_TRUSTEDREDIRECTURIS=https://example.com/callbackTINYAUTH_OIDC_CLIENTS_MYAPP_NAME=myappOr with the following set of CLI flags:
--oidc.clients.myapp.clientid=client-id--oidc.clients.myapp.clientsecret=ta-client-secret--oidc.clients.myapp.trustedredirecturis=https://example.com/callback--oidc.clients.myapp.name=myappApp Configuration
Section titled “App Configuration”Tinyauth exposes a well-known path at /.well-known/openid-configuration that apps can use to automatically discover the OIDC server configuration. If your app does not support discovery, you can configure it with the following endpoints:
| Name | URL |
|---|---|
| Authorization Endpoint | https://tinyauth.example.com/authorize |
| Token Endpoint | https://tinyauth.example.com/api/oidc/token |
| Userinfo Endpoint | https://tinyauth.example.com/api/oidc/userinfo |
After everything is set up, start Tinyauth and access your application. After you select Tinyauth as the authentication source, you should be redirected to Tinyauth, where you can log in and authorize the application.
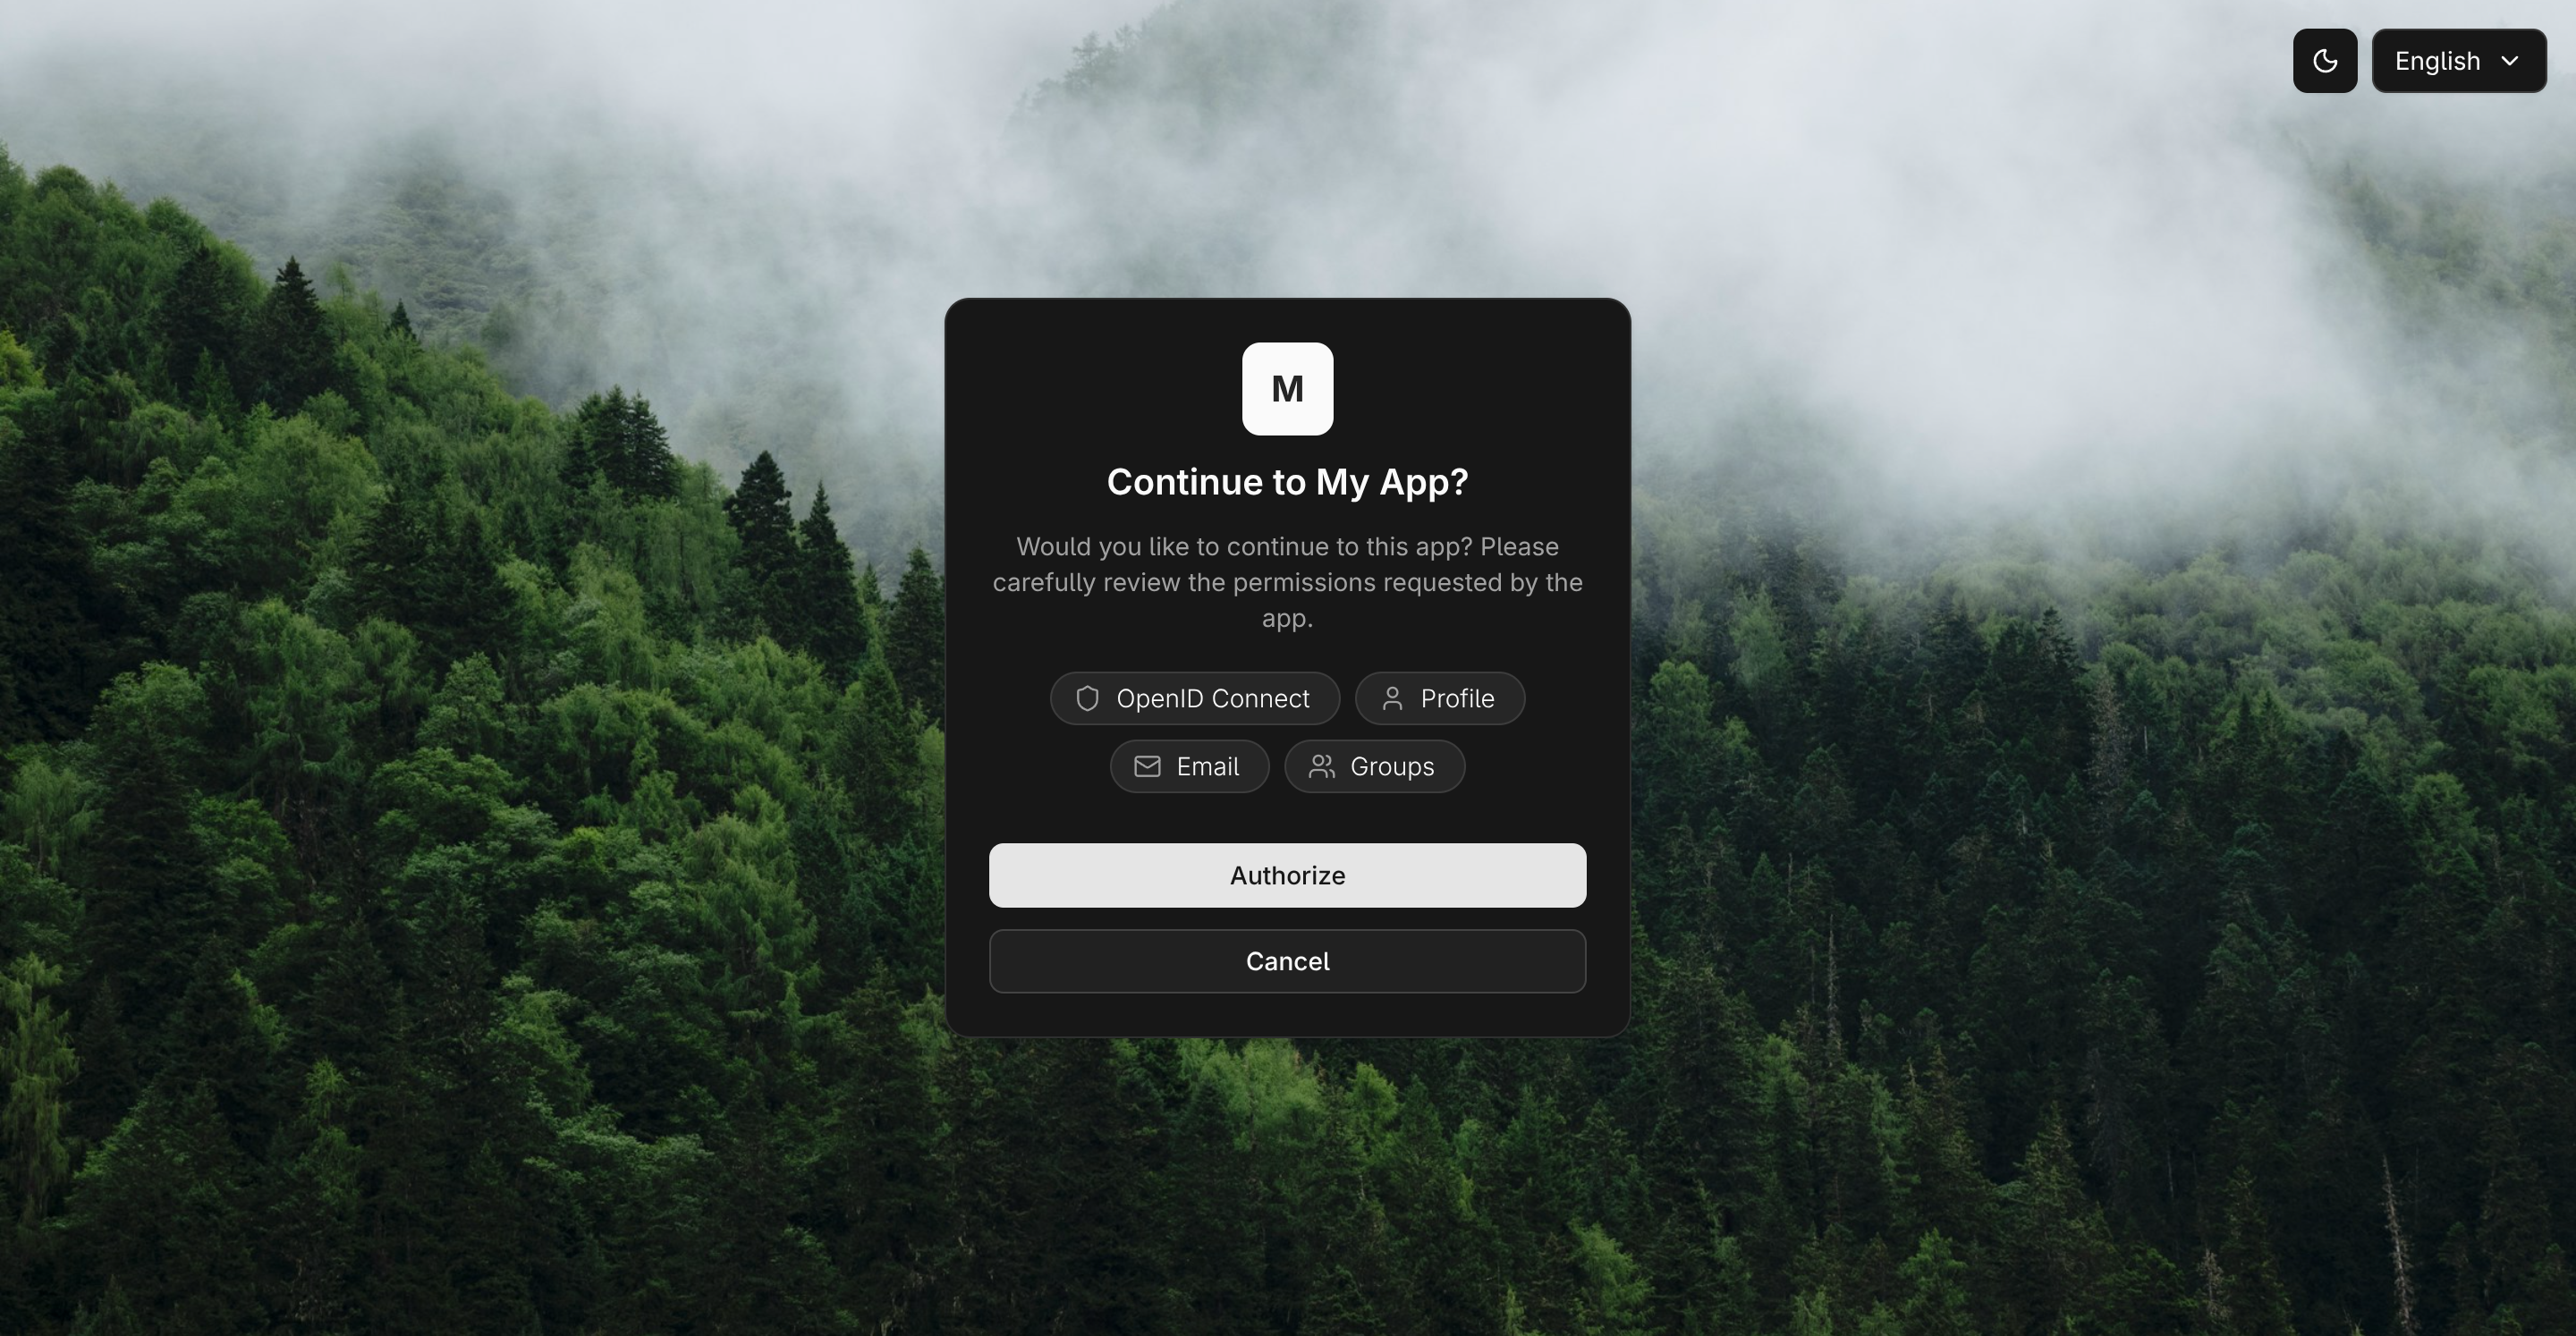
Tinyauth will pass user information from the OIDC or LDAP provider to the application while acting as a proxy. Enjoy!